


What’s the optimal pre-shave prep to prevent razor burn & ensure a peak performance shave?

For many, shaving is a daily ritual, yet the discomfort of razor burn, ingrown hairs, and an uneven finish often plagues the experience. The secret to a consistently clean, close, and comfortable shave doesn’t lie solely in the razor itself, but primarily in the meticulous preparation that precedes it. An optimal pre-shave routine transforms your skin and whiskers, setting the stage for a peak performance shave that minimizes irritation and maximizes smoothness.
Why Pre-Shave Prep is Non-Negotiable
Think of pre-shave preparation as warming up for an athletic event. You wouldn’t dive into intense exercise without stretching, and similarly, your skin shouldn’t face a sharp blade without proper conditioning. The goals of a good pre-shave routine are multifaceted: to soften the beard, cleanse the skin, lubricate the surface, and create a protective barrier. Neglecting these steps can lead to a host of problems, including tugging, pulling, nicks, cuts, and the dreaded razor burn.

Step 1: Cleansing for a Clean Slate
The very first step is to wash your face thoroughly. Throughout the day, dirt, oil, and dead skin cells accumulate on the surface. Shaving over this grime can clog your razor, dull the blade faster, and push bacteria into freshly opened pores, leading to irritation and breakouts. Use a gentle facial cleanser, preferably one designed for men’s skin, to remove impurities. Exfoliating 2-3 times a week can also be beneficial, helping to remove dead skin cells and lift hairs for a closer shave, but avoid exfoliating immediately before every shave if you have sensitive skin.
Step 2: Hydration and Softening with Warmth
This is arguably the most critical step. Warmth and moisture are essential for softening your whiskers, making them easier for the razor to cut. Think of a dry hair versus a wet hair – the latter is much more pliable. The best way to achieve this is with a hot shower or a warm, damp towel compress. Spend a few minutes under the warm water, letting the steam and heat penetrate your beard. Alternatively, soak a clean towel in hot water, wring it out, and hold it over your face for 2-3 minutes. This not only softens the hair but also opens pores, promoting a smoother glide.

Step 3: The Pre-Shave Oil Advantage
Once your face is cleansed and warmed, it’s time for pre-shave oil. This often-overlooked product is a game-changer for many. A few drops of quality pre-shave oil applied to your damp face create a slick, protective layer between your skin and the razor. It helps the blade glide effortlessly, reduces friction, and provides an extra cushion against irritation. Look for oils with natural ingredients like castor oil, olive oil, or essential oils that nourish the skin without clogging pores. Gently massage it into your beard area, ensuring even coverage.

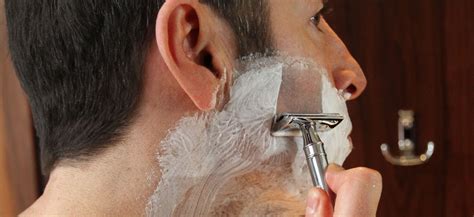
Step 4: Building the Perfect Lather
With your skin cleansed, softened, and protected, the final pre-shave step is applying a rich, creamy lather. Forget aerosol cans; invest in a quality shaving cream or soap and a good badger or synthetic brush. A proper lather does more than just look good; it further hydrates the whiskers, holds them upright for the blade, and acts as another layer of lubrication. Use your brush to work the cream or soap into a thick, dense lather, applying it in circular motions to thoroughly coat every hair and lift it away from the skin.
Conclusion: Shave Smarter, Not Harder
An optimal pre-shave routine is not a luxury; it’s a necessity for anyone seeking to prevent razor burn, minimize irritation, and achieve an impeccably smooth shave every time. By dedicating a few extra minutes to cleansing, hydrating with warmth, applying pre-shave oil, and building a proper lather, you’ll transform your shaving experience from a chore into a luxurious ritual. Invest in quality products and commit to these steps, and your skin will thank you with a comfortable, irritation-free, and peak performance shave that lasts.