


Eliminate razor burn: What’s the optimal pre-shave prep for irritation-free precision?

The Silent Enemy of a Smooth Shave: Understanding Razor Burn
Razor burn, characterized by redness, stinging, and bumps, is a common affliction that can turn the simple act of shaving into a dreaded chore. Far from being an inevitable consequence, it’s often a direct result of improper technique or, more frequently, inadequate preparation. The truth is, achieving that coveted irritation-free, precise shave largely hinges on what you do before the blade even touches your skin.
Step 1: The Warm Water Welcome – Soften and Open
The foundation of any great shave begins with warm water. A hot shower before shaving is ideal as the steam and warmth soften both your skin and beard hairs, making them more pliable and easier for the razor to cut. If a shower isn’t feasible, a warm, damp towel applied to the face for a few minutes can achieve a similar effect. This step not only relaxes the skin but also helps to open up pores, allowing for a deeper cleanse and better product penetration.
Step 2: Cleanse and Gently Exfoliate – Clear the Path
Once your skin is warm and supple, the next crucial step is to cleanse away impurities. Dirt, oil, and dead skin cells can clog pores and dull your razor, leading to tugging and irritation. Use a mild facial cleanser to purify the skin. For an even better outcome, consider a gentle exfoliant 2-3 times a week. Exfoliation helps to remove dead skin cells that can trap hairs, preventing ingrown hairs and ensuring a smoother surface for your razor to glide over. Be mindful not to over-exfoliate, especially if you have sensitive skin.

Step 3: The Protective Barrier – Pre-Shave Oil or Cream
This is arguably the most underrated step in the pre-shave routine. A good quality pre-shave oil or cream acts as a vital buffer between your skin and the razor blade. Applied after cleansing, these products create a slick, protective layer that allows the razor to glide effortlessly, minimizing friction and reducing the chances of nicks, cuts, and, crucially, razor burn. They also provide an extra layer of moisture, further softening the hair and protecting the skin.

Step 4: Build a Rich Lather – The Cushion of Comfort
While often considered part of the shave itself, applying your shaving cream, gel, or soap correctly is intrinsically linked to pre-shave prep. A rich, thick, and well-hydrated lather is paramount. It should not be foamy or airy, but rather dense and creamy, providing substantial cushioning and lubrication. Use a shaving brush to work the product into your beard in circular motions. This not only lifts the hairs away from the skin, making them easier to cut, but also ensures even distribution of the product, hydrating each strand.
![100+ Man Images [HD] | Download Free Images on Unsplash](/images/aHR0cHM6Ly90czQuZXhwbGljaXQuYmluZy5uZXQvdGg/aWQ9T0lQLkxMZmNuRmhJUno1NVFWQm1ENVJKbXdIYUxIJnBpZD0xNS4x.webp)
Beyond Pre-Shave: Quick Shaving and Post-Shave Tips
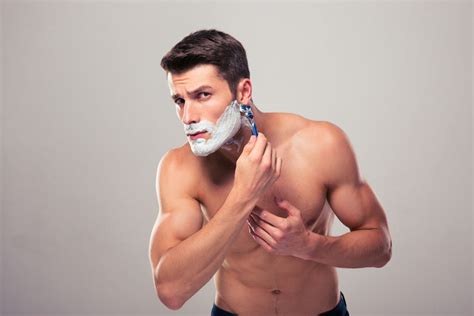
Even with impeccable pre-shave prep, good shaving technique and proper post-shave care are essential to completely banish razor burn. Always use a sharp, clean razor blade, shave with the grain initially, and apply minimal pressure. After shaving, rinse with cold water to close pores, and immediately follow up with a soothing, alcohol-free aftershave balm or moisturizer to hydrate and calm the skin.

Embrace the Prep, Banish the Burn
Eliminating razor burn isn’t about magic; it’s about methodical preparation. By dedicating a few extra minutes to warming your skin, cleansing, exfoliating, applying a protective pre-shave product, and building a proper lather, you transform shaving from a potential source of irritation into a consistently smooth, comfortable, and precise experience. Invest in your pre-shave ritual, and your skin will thank you with an irritation-free finish.