


How to fix hip pain during squats for better form?
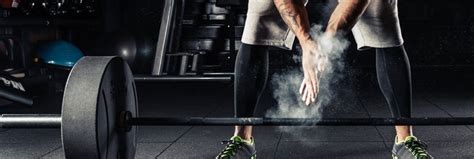
Squats are a foundational exercise, building strength and power throughout the lower body. However, for many, this essential movement is accompanied by nagging hip pain, turning a beneficial exercise into a source of discomfort and frustration. Addressing hip pain during squats is not just about alleviating discomfort; it’s about optimizing your mechanics, preventing long-term injury, and unlocking your full potential in the gym. This guide will delve into the common causes of hip pain during squats and provide actionable strategies to correct your form for a pain-free, more effective workout.
Understanding the Root Causes of Hip Pain
Hip pain during squats can stem from various issues, often a combination of factors related to flexibility, strength, and technique. Identifying the specific cause is the first step toward finding an effective solution.
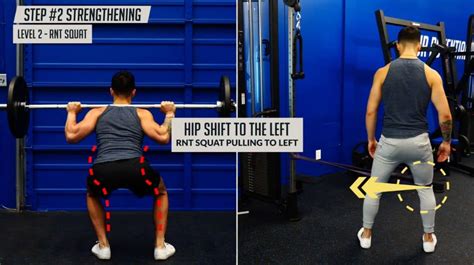
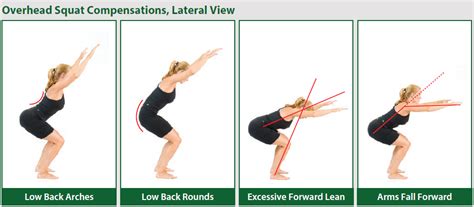
- Poor Squat Form: Incorrect foot placement, knee valgus (knees collapsing inward), excessive lumbar rounding, or an unbalanced distribution of weight can put undue stress on the hip joint.
- Limited Hip Mobility: Stiff hip flexors, tight adductors (inner thigh muscles), or restricted internal/external rotation can prevent you from achieving a proper squat depth and natural movement pattern.
- Weak Glutes or Core: The glutes and core muscles are crucial stabilizers during a squat. If they are weak, other muscles, including those around the hip joint, compensate, leading to overuse and pain.
- Muscle Imbalances: An imbalance between opposing muscle groups (e.g., strong quads but weak hamstrings or glutes) can pull the pelvis out of alignment and affect hip function.
- Existing Conditions: Pre-existing issues like hip impingement (FAI), bursitis, or labral tears can be exacerbated by squatting, making it essential to consult a healthcare professional if pain persists.
Corrective Strategies for Pain-Free Squats
1. Master Your Squat Form
Precision in form is paramount. Focus on these cues:
- Stance: Experiment with foot width and toe angle. A slightly wider stance with toes pointed slightly out (10-30 degrees) often allows better hip clearance.
- Knee Tracking: Ensure your knees track in line with your toes throughout the movement. Pushing your knees out against imaginary bands can help activate the glutes and prevent valgus.
- Hip Hinge: Initiate the squat by pushing your hips back, as if sitting into a chair, rather than just bending your knees. This helps load the posterior chain.
- Bracing: Brace your core by taking a deep breath and tensing your abdominal muscles, maintaining a neutral spine.
- Depth: Squat only as deep as your mobility allows without compromising form or experiencing pain. Over time, depth can improve.
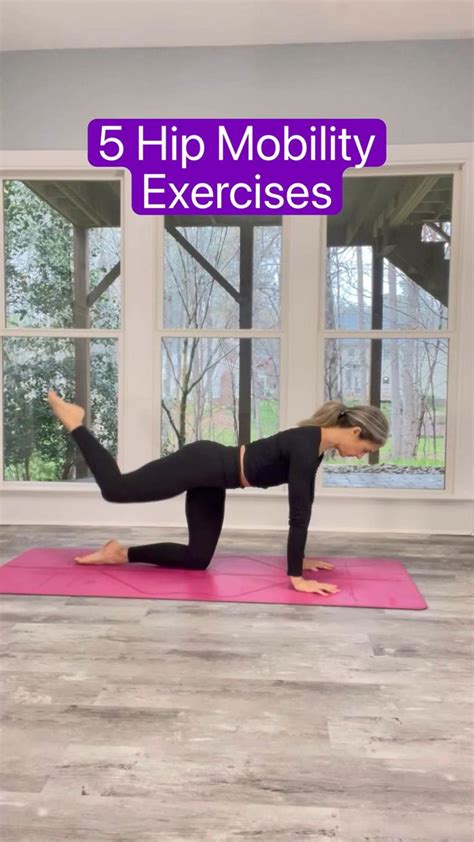
2. Enhance Hip Mobility
Incorporating specific stretches and mobility drills into your warm-up and cool-down routines can significantly improve your hip’s range of motion.
- 90/90 Stretch: Sit on the floor with one knee bent at 90 degrees in front of you and the other bent at 90 degrees to your side. Gently lean forward over the front leg to deepen the stretch.
- Pigeon Pose: A classic yoga pose that opens up the hips.
- Spiderman Lunges with Thoracic Rotation: Great for opening up hip flexors and improving rotational mobility.
- Leg Swings: Dynamic front-to-back and side-to-side leg swings prepare the hip joint for movement.
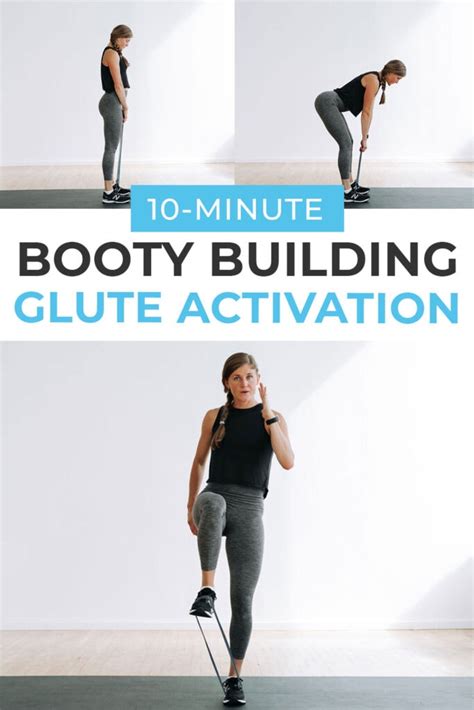
3. Activate and Strengthen Your Glutes
Weak or inactive glutes are a common culprit for hip pain. Incorporate glute activation exercises before your squats to ensure these powerful muscles are firing correctly.
- Band Walks: Place a resistance band around your ankles or knees and walk sideways, maintaining tension on the band.
- Clamshells: Lie on your side with knees bent and stacked. Keeping your feet together, open your top knee like a clamshell.
- Glute Bridges: Lie on your back with knees bent, feet flat. Lift your hips off the ground, squeezing your glutes at the top.
- Hip Thrusts: A more advanced glute-strengthening exercise than glute bridges.
4. Address Muscle Imbalances and Strengthen the Core
A strong core provides stability for the entire kinetic chain. Incorporate exercises like planks, bird-dogs, and anti-rotation drills. Also, ensure balanced strength in your hamstrings, quads, and adductors through varied exercises.
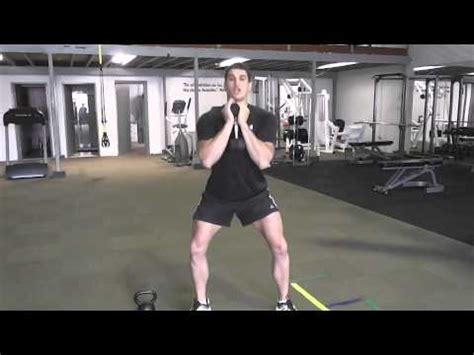
5. Modify Your Squat Variation
If traditional barbell back squats are too painful, consider alternatives:
- Goblet Squats: Holding a dumbbell or kettlebell in front of your chest can help maintain an upright torso and improve depth with less hip stress.
- Box Squats: Squatting to a box ensures you hit a consistent depth and can help you focus on sitting back.
- Dumbbell Squats: Offer more freedom of movement than a barbell.
- Suspension Trainer Squats: Use a TRX or similar trainer for support, allowing you to focus on form and depth without heavy load.
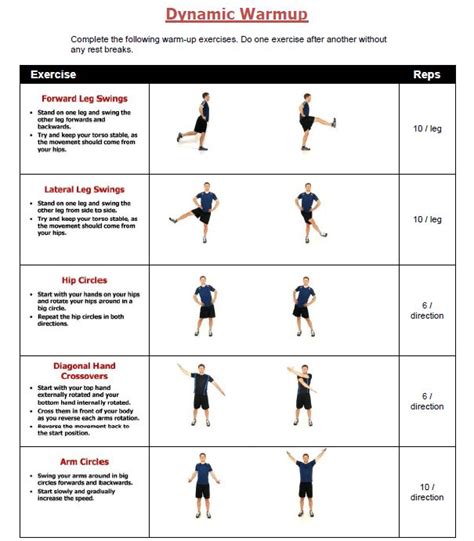
6. The Importance of a Proper Warm-Up and Cool-Down
Never skip these crucial steps. A dynamic warm-up increases blood flow and prepares your joints and muscles for activity, while a cool-down with static stretches aids recovery and maintains flexibility.
When to Seek Professional Help
While many common causes of hip pain can be addressed with form corrections and targeted exercises, persistent or worsening pain, sharp pain, or pain accompanied by clicking/locking sensations warrants consultation with a doctor, physical therapist, or qualified coach. They can diagnose underlying conditions and provide a personalized rehabilitation plan.
Conclusion
Hip pain during squats doesn’t have to be a permanent roadblock to your fitness goals. By diligently assessing your form, improving hip mobility, activating your glutes, and considering squat modifications, you can transform your squat into a powerful, pain-free exercise. Remember, consistency and patience are key. Listen to your body, make gradual adjustments, and prioritize proper movement mechanics to build a strong, resilient foundation for all your workouts.