


Prevent hiking boot blisters on multi-day treks?
Conquering the Trail, Not Blisters: Essential Prevention for Multi-Day Treks
There’s nothing quite like the exhilaration of a multi-day hiking adventure, but a single, unwelcome companion can quickly turn a dream into a dread: the dreaded hiking blister. These painful pockets of fluid can derail your trek, dampen your spirit, and even force an early exit. Fortunately, with the right preparation and strategies, you can significantly reduce your risk and keep your feet happy from trailhead to summit.
The Foundation: Your Boots and Socks
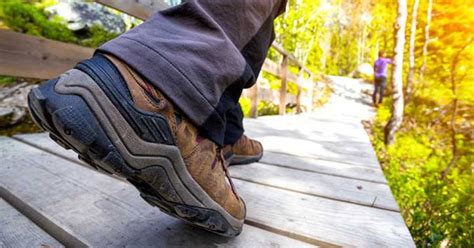
The single most crucial factor in blister prevention is your footwear. It’s not just about having hiking boots; it’s about having the *right* hiking boots and pairing them with appropriate socks.
1. The Perfect Fit is Non-Negotiable
Your boots should fit snugly but not tightly, with enough room to wiggle your toes. Your heel should remain secure, minimizing slippage that causes friction. Always try on boots at the end of the day when your feet are slightly swollen, and wear the type of socks you intend to hike in. Don’t rush this process; walk around the store, go up and down inclines if possible.
2. Break Them In Properly
New boots are stiff and need to mold to your feet. Never embark on a multi-day trek with brand-new, un-broken-in boots. Start with short walks, gradually increasing distance and terrain difficulty. This allows the materials to soften and your feet to adapt, revealing any hot spots before they become full-blown blisters.
3. The Right Socks Make All the Difference
Cotton is the enemy of happy feet on the trail. It absorbs moisture and stays wet, leading to friction and blisters. Opt for synthetic blends (nylon, polyester) or merino wool socks, which wick moisture away from your skin. Many experienced hikers swear by a two-sock system: a thin liner sock (synthetic or silk) to wick moisture, covered by a thicker, cushioned hiking sock. This creates a friction barrier between the two sock layers rather than directly on your skin.
Proactive Foot Care Before and During Your Trek
Beyond your gear, how you prepare and manage your feet plays a significant role.
1. Condition Your Feet
Before a long trek, toughen up your feet by regularly walking in your hiking boots. Some hikers even recommend applying rubbing alcohol or a foot toughener for a few weeks prior to help harden the skin, but this should be done cautiously.
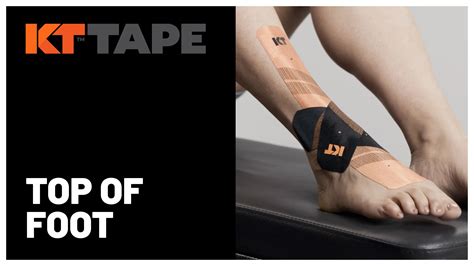
2. Lubricate or Tape Potential Hot Spots
If you know you have areas prone to blistering (e.g., heels, arches, between toes), preemptively apply a friction-reducing balm (like Body Glide or Vaseline) or athletic tape. Apply tape smoothly to clean, dry skin, ensuring no wrinkles that could cause more friction.
3. Manage Moisture Relentlessly
Wet feet are blister-prone feet. Change your socks regularly, especially if your feet sweat a lot or get wet from external sources. Air out your feet during breaks. At camp, remove your boots and socks, clean and dry your feet thoroughly, and let them breathe overnight. Carrying an extra pair or two of clean, dry socks is a must.
4. Keep Nails Trimmed
Long toenails can press against the front of your boots, causing pain and even subungual (under the nail) blisters. Keep them neatly trimmed straight across, not too short, to avoid ingrown nails.
On-Trail Strategies for Blister-Free Hiking
Even with the best preparation, continuous vigilance on the trail is key.
1. Act Immediately on Hot Spots
The moment you feel any discomfort, a “hot spot,” stop and address it. Don’t wait for it to become a blister. Remove your boot and sock, check the area, and apply moleskin, athletic tape, or a specialized blister patch. Early intervention is your best defense.

2. Master Your Lacing Technique
Different lacing methods can alleviate pressure points. Experiment with techniques like “heel lock” lacing to prevent slippage or skipping eyelets over sensitive areas. Adjust your laces throughout the day as your feet swell or terrain changes.
3. Take Regular Breaks
Scheduled breaks aren’t just for resting your muscles; they’re vital for your feet. Remove your boots and socks, air out your feet, and allow them to dry. This reduces moisture buildup and gives your feet a chance to recover.
4. Mind Your Pace and Foot Placement
A consistent, moderate pace reduces sudden impacts and friction. Pay attention to how your feet land, especially on descents, to minimize rubbing and sliding within your boots.
When a Blister Strikes: First Aid on the Trail
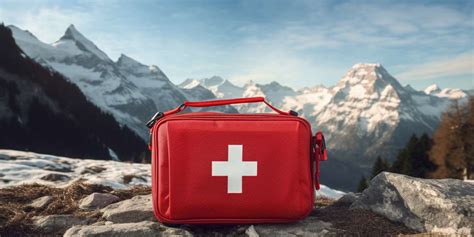
Despite all precautions, a blister might still form. Being prepared with a comprehensive blister kit is essential.
What to Include in Your Blister Kit:
- Alcohol wipes or antiseptic solution
- Sterile needle (for draining, if necessary)
- Various sizes of moleskin or blister pads (e.g., Compeed)
- Medical tape (e.g., athletic tape, duct tape)
- Small scissors
How to Treat a Blister:
- Small, Intact Blister: Clean the area, apply a moleskin donut around it (not directly on it), and cover with tape. Let the body absorb the fluid.
- Large, Painful Blister: Clean the area thoroughly. Sterilize a needle with alcohol or flame. Puncture the blister at its base, allowing the fluid to drain. Do not remove the skin flap, as it protects the raw skin underneath. Apply antiseptic, then cover with a sterile dressing or a specialized blister pad. Monitor for infection.
Ultimately, prevention is far better than cure. By investing time in proper gear selection, foot care, and smart on-trail habits, you can keep those painful blisters at bay and fully immerse yourself in the beauty and challenge of your multi-day hiking adventures. Happy trails!