


Optimal backpack hip belt fit for heavy loads?
The Foundation of Comfort: Why Your Hip Belt Matters Most
When you’re carrying a heavy backpack, whether for a multi-day trek or a winter expedition, the hip belt isn’t just a strap—it’s the backbone of your carrying system. A properly fitted hip belt can transform a painful slog into a manageable journey by transferring the majority of the pack’s weight from your shoulders to your much stronger leg and hip muscles. Understanding and mastering its adjustment is the single most important factor for comfort and endurance with heavy loads.
Many hikers overlook the critical role of the hip belt, often tightening shoulder straps first or failing to achieve the correct placement. This leads to shoulder strain, back pain, and premature fatigue. For loads exceeding 20-25 pounds, the hip belt should ideally bear 70-80% of the pack’s weight, making its optimal fit non-negotiable.
Identifying Your Iliac Crest: The Anchor Point
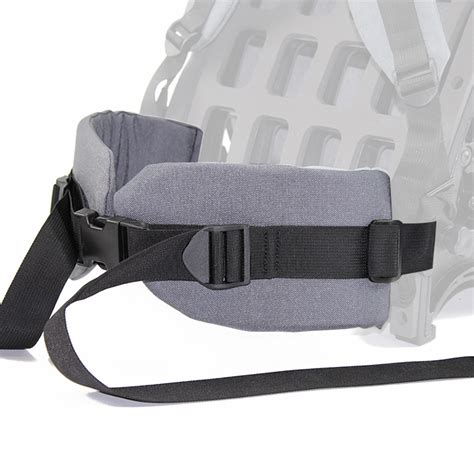
The secret to an optimal hip belt fit lies in its placement relative to your iliac crests, which are the prominent bony edges at the top of your pelvis. The hip belt should sit directly on, or slightly above, these bones. This allows your skeletal structure to support the weight, rather than relying on muscle alone. To find your iliac crests, place your hands on your hips and feel for the highest points of your pelvic bones.
A common mistake is letting the hip belt ride too low, around the soft part of your waist, which results in slippage and ineffective weight transfer. Conversely, if it’s too high, it can restrict movement and cause discomfort.
Step-by-Step Guide to Achieving the Perfect Fit
1. Loosen All Straps
Before you even put the pack on, loosen all straps: hip belt, shoulder straps, load lifters, and sternum strap. This gives you a clean slate for adjustment.
2. Put on the Pack and Center the Belt
Carefully lift your pack and place it on your back. Position the hip belt so its center is directly over your iliac crests. It might feel a bit loose at this point, but focus on the correct vertical placement.
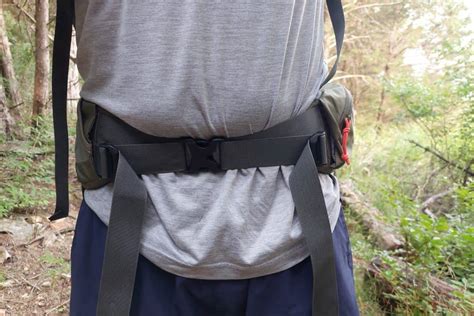
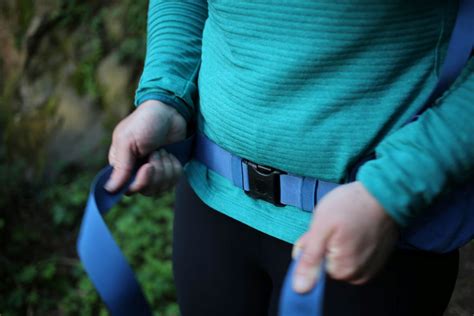
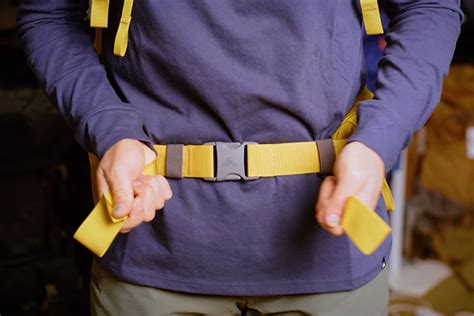
3. Cinch the Hip Belt Firmly
Pull the hip belt straps forward and tighten them firmly. The belt should feel snug and secure, like a hug around your hips, without being painfully tight or restricting your breathing. It should not be able to slide down your hips easily. Wiggle your hips; the pack should move with you, not swing independently.
4. Adjust Shoulder Straps
Once the hip belt is secure, gently pull down on your shoulder strap adjusters. The shoulder straps should feel snug against your shoulders, carrying only a small percentage (20-30%) of the load, primarily stabilizing the pack and keeping it from falling backward. There should be no significant gaps between the straps and your shoulders.
5. Engage Load Lifters
Look for the straps that run from the top of your shoulder straps up to the top of the pack. These are your load lifters. Pull them forward until they create about a 45-degree angle from your shoulders to the pack. Load lifters pull the top of the pack closer to your body, preventing it from flopping backward and shifting weight more efficiently over your hips. Do not over-tighten them, as this can create a gap between your shoulders and the shoulder straps, negating their purpose.
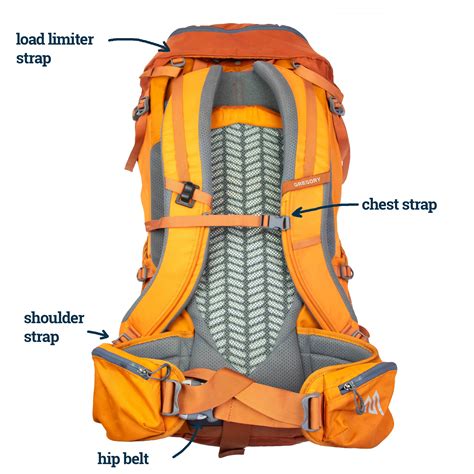
6. Fasten the Sternum Strap
Finally, clip and adjust your sternum strap across your chest. This strap pulls the shoulder straps inward, preventing them from slipping off your shoulders and allowing for better arm movement. It should be snug enough to do its job but not so tight that it restricts breathing or causes discomfort.
Common Pitfalls and How to Avoid Them
The most common errors include tightening the shoulder straps too much before the hip belt, allowing the hip belt to sag below the iliac crests, or failing to make micro-adjustments on the trail. Your body changes as you hike (e.g., muscles fatigue, water weight changes), so periodic adjustments to your hip belt, load lifters, and shoulder straps are essential for sustained comfort. Pay attention to any pinching, rubbing, or pressure points and adjust accordingly.
Fine-Tuning on the Trail
Even with an initial perfect fit, conditions change. As you consume food and water, your pack’s weight distribution shifts. Keep an eye on how your pack feels. If you start to feel increased pressure on your shoulders, re-check your hip belt. It may have loosened slightly, or the pack’s center of gravity might have shifted. A quick tightening of the hip belt, followed by a minor adjustment to the load lifters, can often restore comfort.
Experiment with the tension of the load lifters. Too tight, and they can pull the shoulder straps off your shoulders or create uncomfortable pressure points. Too loose, and the top of your pack will pull away, creating a ‘lever’ effect that feels heavier. The goal is to achieve a balanced, stable carry that moves with your body.
Conclusion: Invest in Your Comfort
Mastering the art of backpack hip belt adjustment for heavy loads is a skill that will profoundly impact your hiking enjoyment and physical well-being. It’s not just about enduring the weight; it’s about efficiently managing it, allowing you to focus on the trail and the experience rather than discomfort. Take the time to practice these adjustments before your next adventure, and you’ll find that even the heaviest loads can feel surprisingly manageable.