


How to fix deadlift form for lower back safety?
The deadlift is often hailed as the king of all exercises, building immense strength, power, and muscle across the entire posterior chain. However, its effectiveness comes with a significant caveat: poor form can lead to severe lower back injuries. Protecting your spine is paramount, and understanding how to execute a deadlift correctly is the first step towards a long and safe lifting career.
Understanding Common Deadlift Form Mistakes
Many lifters unknowingly put their lower back at risk by making common errors. Identifying these missteps is crucial for correction:
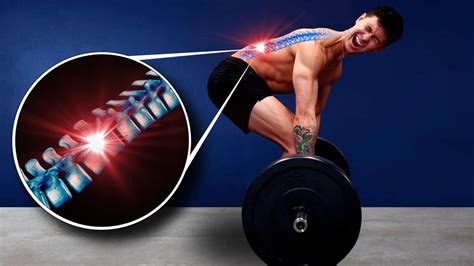
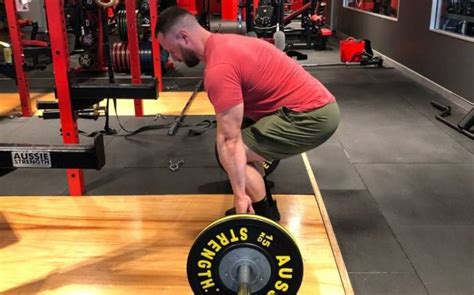
- Rounding the Lower Back: This is arguably the most dangerous mistake. It places immense shearing forces on the lumbar spine, making it highly susceptible to disc herniation. This often happens when the hips rise too quickly or the lifter tries to lift with their back instead of their legs.
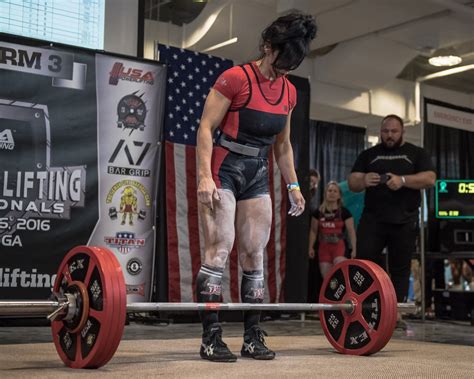
- Hyperextending at the Top: While a common cue is to “stand tall,” pushing the hips too far forward and arching the lower back excessively at the lockout can compress the lumbar vertebrae. The lockout should be a neutral, standing position, not a backward lean.
- Bar Drifting Away from the Body: The deadlift bar should travel in a straight vertical line, as close to your body as possible. When the bar drifts forward, it increases the lever arm, putting more strain on the lower back.
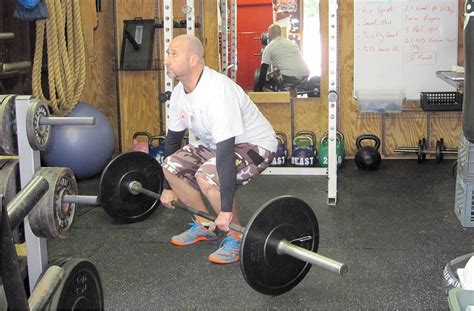
- Starting with Hips Too Low or Too High: Finding the optimal starting hip height is key. Hips that are too low turn the deadlift into a squat, while hips too high can lead to a rounded back and early hip extension.
- Not Bracing the Core: A strong, braced core acts as a natural weightlifting belt, stabilizing the spine. Failing to brace properly leaves the lower back vulnerable.
Key Principles for a Safe Deadlift
Correcting deadlift form involves a comprehensive approach, focusing on several critical elements:
1. Master the Hip Hinge
The deadlift is a hip-dominant movement, not a squat. Learning to hinge at the hips while maintaining a neutral spine is fundamental. Think about pushing your glutes backward as if reaching for a wall behind you, rather than just bending your knees. Your chest should stay up, and your shins should remain relatively vertical in the starting position.
2. Achieve Optimal Setup
- Foot Stance: Stand with your feet hip to shoulder-width apart, toes pointing slightly out (around 10-15 degrees).
- Bar Position: The bar should be over the middle of your feet, roughly an inch from your shins. This ensures a proper bar path.
- Grip: Use an overhand or mixed grip (one hand over, one under) slightly wider than shoulder-width. “Pull the slack out of the bar” by engaging your lats and pulling your shoulders down and back before initiating the lift.

3. Brace Your Core Effectively
Before every rep, take a deep breath into your belly, not your chest. Then, brace your abdominal muscles as if preparing for a punch. This intra-abdominal pressure stabilizes your spine and helps transfer force from your legs to the bar. Imagine squeezing a tennis ball between your butt cheeks to further engage your glutes and protect your lower back.
4. Maintain a Straight Bar Path
Throughout the lift, the bar should travel vertically, grazing your shins and then thighs. Use your lats to keep the bar pulled in close to your body. Any deviation away from your body significantly increases the leverage on your lower back. Focus on driving your feet through the floor and extending your hips and knees simultaneously.
5. Lockout and Descent
At the top, stand tall with your shoulders back and chest out. Do not lean backward or hyperextend your lower back. The lockout should be a strong, neutral standing position. For the descent, reverse the movement by pushing your hips back first, allowing the bar to track down your thighs and then shins in a controlled manner. Avoid dropping the weight or letting it crash, especially when learning.
Drills and Cues for Improvement
- Romanian Deadlifts (RDLs): Excellent for teaching the hip hinge while maintaining a neutral spine. Focus on feeling the stretch in your hamstrings.
- Good Mornings: Performed with very light weight or a PVC pipe, these help reinforce the hip hinge movement and strengthen the posterior chain.
- Dowel Rod Test: Hold a dowel rod against your back, touching your head, upper back, and tailbone. Maintain these three points of contact throughout the hinge to ensure a neutral spine.
- “Pull the Slack Out”: Before lifting, pull up on the bar just enough to hear the plates clink and feel tension throughout your body. This primes your muscles and ensures a smoother, safer lift.
- “Screw Your Feet into the Floor”: This cue helps engage your glutes and create external rotation in your hips, stabilizing your stance.
When to Seek Professional Guidance
If you consistently experience lower back pain during or after deadlifts, or if you struggle to correct your form despite diligent practice, it’s essential to seek guidance from a qualified strength coach or physical therapist. They can assess your individual biomechanics, identify specific weaknesses, and provide personalized coaching to ensure your safety and progress.
Mastering the deadlift is a journey that prioritizes form over ego. By understanding the common pitfalls, adhering to fundamental principles, and practicing diligently, you can safely harness the power of this incredible exercise, building a strong, resilient body while protecting your lower back for years to come.