


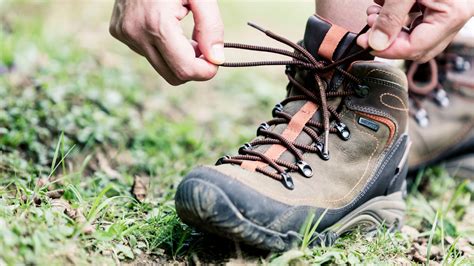
What’s your go-to method for waterproofing hiking boots after a season of use?

Reviving Your Footwear: The Importance of Post-Season Waterproofing
After a season of traversing trails, battling mud, and enduring various weather conditions, even the most robust hiking boots can start to lose their waterproof efficacy. The Durable Water Repellent (DWR) coating wears off, and the leather or fabric can become less resistant to moisture. Re-waterproofing isn’t just about keeping your feet dry; it’s about extending the lifespan of your valuable gear, maintaining comfort, and ensuring optimal performance on your next outing.

Step 1: The Essential Clean-Up
Before you even think about applying a new waterproofing treatment, a thorough cleaning is paramount. Applying new treatment to dirty boots is like painting a dusty wall – it won’t adhere properly or last long. This step is often overlooked but is critical for success.
Removing Dirt and Debris
- Remove laces and insoles: This allows you to clean all areas of the boot and prevents laces from becoming coated with treatment.
- Brush off loose dirt: Use a stiff brush (a dedicated boot brush works best) to remove mud, dust, and dried-on debris from the uppers, soles, and especially the crevices around the rand and stitching.
Washing Your Boots
Using lukewarm water and a specialized boot cleaner, or even a mild soap like dish soap (sparingly), scrub the entire exterior of the boots. Pay close attention to areas where dirt tends to accumulate. Rinse thoroughly to remove all soap residue. For leather boots, be gentle to avoid oversaturating the leather.
Drying Properly
Allow your boots to air dry completely in a well-ventilated area, away from direct heat sources like radiators or campfires, which can damage the materials. Stuffing them loosely with newspaper can help absorb moisture and maintain their shape, changing the paper periodically.
Step 2: Choosing Your Waterproofing Weapon
The best waterproofing method depends largely on the material of your hiking boots. Modern boots are made from a variety of materials, including full-grain leather, nubuck, suede, synthetic fabrics, or a combination.
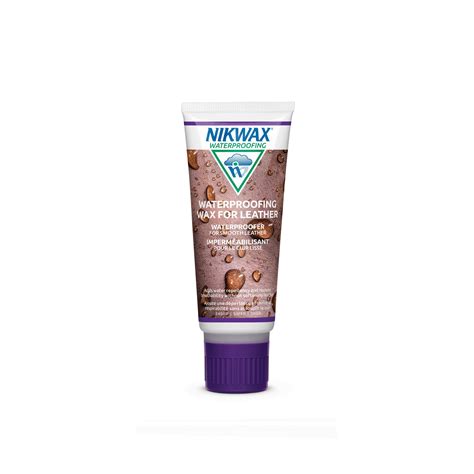
Wax-Based Treatments (Ideal for Leather)
For traditional full-grain leather boots, wax-based treatments (often a blend of beeswax, silicones, or oils) are a popular and effective choice. They condition the leather, maintaining its pliability while creating a strong water barrier. Brands like Nikwax or Sno-Seal offer excellent options.

Spray-On Treatments (Versatile for Synthetics & Mixed Materials)
If your boots feature synthetic fabrics, Gore-Tex, or a mix of leather and fabric (like many modern lightweight hikers), a spray-on DWR restorer is usually the go-to. These treatments bond to the fabric fibers, restoring breathability while repelling water. Grangers and Nikwax are leading brands in this category.
Cream/Paste Treatments (Good for Nubuck/Suede and Leather)
Similar to wax, but often with a lighter consistency, creams and pastes can be good for nubuck, suede, and leather. They offer conditioning and waterproofing without significantly altering the appearance of softer leathers as much as some waxes might.
Step 3: Application Techniques for Lasting Protection
Once your boots are clean and dry (or slightly damp, as some treatments recommend for better absorption), it’s time to apply the chosen waterproofing agent.
- Wax-Based: Apply a small amount of wax using a cloth or your fingers, working it into the leather in small circular motions. Pay extra attention to seams, stitching, and areas that experience high wear. Heat from your hands can help the wax penetrate. Buff off any excess after allowing it to soak in.
- Spray-On: Hold the bottle about 6 inches away and spray an even coat over the entire boot surface. Ensure complete coverage, but avoid oversaturation. Wipe off any drips or excess with a clean cloth, especially from eyelets or metal parts.
- Cream/Paste: Apply with a sponge applicator or cloth, rubbing it into the material. Ensure even coverage and allow it to absorb.
Always follow the specific instructions on your chosen product, as application methods and drying times can vary.
Step 4: Aftercare and Storage for Longevity
After re-waterproofing, proper care will help maintain the treatment and the boots themselves.
- Allow to Cure: Let the boots sit for at least 24 hours (or as recommended by the product) to allow the treatment to fully cure and bond.
- Regular Light Cleaning: After future hikes, simply brush off loose dirt. If a deeper clean is needed, use plain water or a very mild boot cleaner.
- Store Properly: Keep your boots in a cool, dry, well-ventilated area, away from direct sunlight or extreme temperatures. Avoid storing them in plastic bags, which can trap moisture and promote mildew.

Conclusion: Invest in Your Footwear, Enhance Your Adventures
Re-waterproofing your hiking boots after a season of rigorous use is more than just a chore; it’s an investment in your comfort, safety, and the longevity of your gear. By following these steps – thorough cleaning, choosing the right treatment, careful application, and diligent aftercare – you can ensure your trusty companions are ready to tackle whatever wet and wild conditions your next adventure throws your way, keeping your feet dry and happy for many more miles to come.